To upload data for MIPS, simplified QCDR and licensed measures, start by logging in to your NRDR account and navigating to the MIPS Participation Portal and selecting Data Collection and Reports.
From the portal menu select the Upload QM Data tab. This page allows you to
download data file templates and specifications
upload data files
search for and check the status of previous data file uploads
Note: The Upload QM Data function is used to upload data for MIPS quality measures, simplified QCDR measures and licensed QCDR measures. The GRID Report Turnaround Time measures (ACRad 15-25) and the DIR measure (ACRad 34) are maintained in their respective NRDR registries. Consult the appropriate data submission article if you need to upload data for those QCDR measures:
Facility Administrators, Facility Users and Registry Administrators can log in to the portal and upload measure data for each provider or group. Users may combine quality measure data for a group of physicians in the same file, but there are size limitations (no more than 20,000 rows).
Note: Physician users need to be registered for MIPS before another user can upload data on their behalf.
Creating a Data File
The top of the page provides links to the template specifications and template files for Excel and text file formats, as well as definitions for Upload Status values.  The file specifications describe the data elements, valid values, formats, file naming convention, and other useful information. Review the specifications and download either the Excel or text file (i.e. pipe-delimited file) template and begin entering your data into the file.
Note: We strongly recommend you download and use the ACR template and specification manual to create your data file because doing so automatically creates a file that meets the file naming convention.
Uploading a Data File
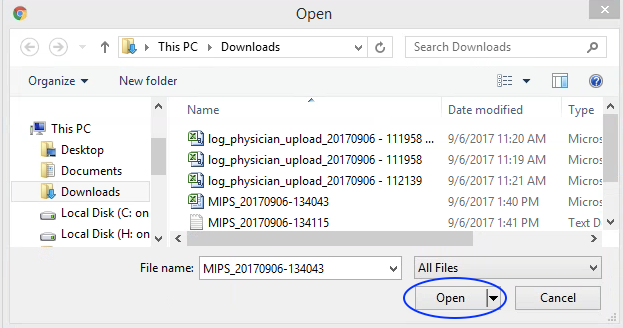
To upload your file, click the Choose File button, navigate to the location of the file on your computer, click on the file and then click the Open button to select the file.
The filename now appears next to the Choose File button. Click Upload to start the upload process.
After the upload completes, a new record appears in the Upload Status table at the bottom of the page. MIPS data files may take up to 24 hours to process before results appear in MIPS Performance Reports. After uploading a file please check the MIPS Portal the following day for a status update. Status definitions are provided in the top right corner of the page.
Note: To avoid processing problems we recommend the following file size limitations:
Excel: no more than 10,000 records per file
Text: no more than 30,000 records per file
If errors are present, hover over the Action button in the last column to download the log file and correct errors identified.
Note: Each filename uploaded to the portal must be unique; therefore, if you need to correct a data file, you must save the updates to a new file.
The bottom portion of the Upload Data page also provides a search function so you can narrow the results of the Upload Status table to a specific date range or for a specific upload status.
 | Previous: MIPS Data Submission Overview | Next: Data Upload File Specifications and Template |  |
